
Export your data
You can easily export your Cloud Logging data in a .csv format, which you can then use in Microsoft Excel, 3rd party BI Tools, or other programs for more advanced analytics.
Prepare your data
Because data is exported from the shown data in the component, and not directly from the Cloud Logging database, we recommend you to use a data table component to export your data. It is possible to export data from several other Cloud Logging components as well.
Before you can export data from a Cloud Logging component, you have to enable this feature in the Studio app. Please follow the steps below to enable this feature:
- Go to Studio which is accessible from the Apps menu in the top right corner if you are currently in a different X4 Remote app.
- Open the main menu, go to Pages, then press the name of the page you would like to export data from, or make a new page.
- Click on the component, and check the option Allow data export to CSV. The table below contains a list of components of which data can be exported.
| Component | Available in pages or cards |
| Data table | Pages |
| Line Graph | Pages |
| Period Barchart | Pages |
| Statusbar | Pages and cards |
Export your data
The next step is to export the actual data. The following steps show you how to export cloud logging data of your devices in a .csv format.
- Go to the Portal which is accessible from the Apps menu in the top right corner if you are currently in a different X4 Remote app.
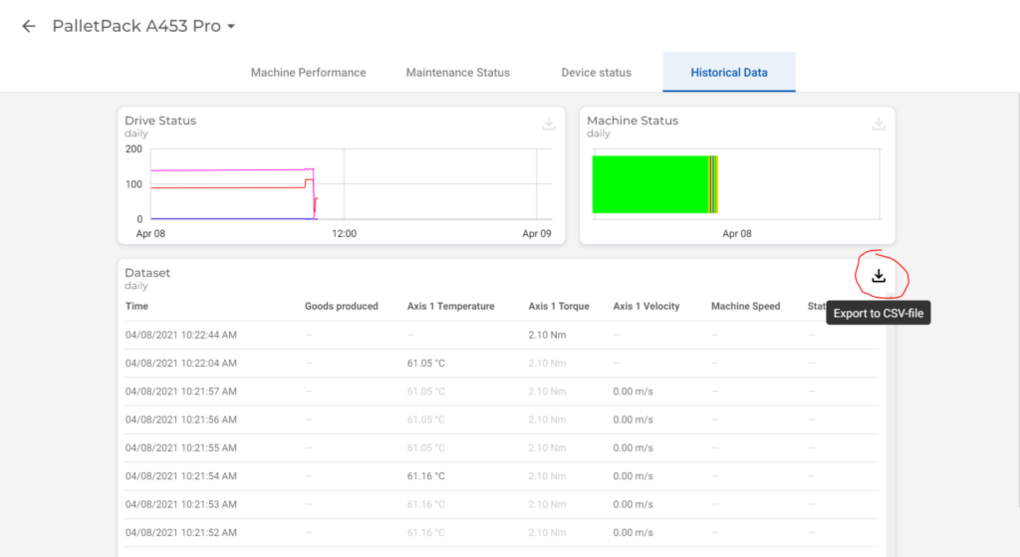
- Click on the device you want to export data from, then go to tab with the component you would like to export data from.
- Use the time picker in the top right corner to set the time period for which you would like to export data.
- Click on Export to CSV-file in the top right corner of the component would like to export data from.
Sort your data
The displayed data may be cleverly processed to quickly display a lot of data, like in a graph component, while you optically don’t lose any detail. Because you export the visible data this effectively means that the exported data may not be equal to the originally logged data. Therefore it might occur that data isn’t exported in chronological order when your are exporting lage amounts of data.
When this issue occurs, you can fix this by using Microsoft PowerShell. To do this, you first need to select the correct file location with the following command line in PowerShell.
cd YOURFOLDERLOCATION
Now that have selected the correct folder, you have to run the following command line to sort the time column in chronological order. Be sure to replace the filenames and column names with the filename and column names of your CSV export.
Import-CSV .\YOURFILENAME.csv |
Select-Object 'time', 'COLUMNNAME1', 'COLUMNNAME2', 'etc.' |
Sort-object 'time' -Descending |
Export-CSV .\NEWFILENAME.csv -NoTypeInformation